Sunday, February 27, 2011

Kids' Classes

Hi hi !!
Yeah, the March hols are coming up and the girls are so looking forward to having a break !

I'll also be running 2 kids' classes at Scraplicious, and will certainly be looking forward to seeing u and your kids there.

Here are the details. Just click on the preferred date to sign up online ! You can even choose to do both as they are run back to back with a half hr break in between :)

Class 1:   I made this !!


Dates:  Monday, 14th Mar 2-3pm  OR   Saturday, 19th Mar 4-5pm
Venue:  Scraplicious (Parkway Parade #B53-54)  tel: 6345 8600


Class 2:   Family and Frens !


Dates: Monday, 14th Mar 3.30-5pm OR Saturday, 19th Mar 2-3.30pm

Venue: Scraplicious (Parkway Parade #B53-54) tel: 6345 8600


Hope to see you there ! Feel free to email me if u have any queries :)

Tuesday, January 4, 2011

Accordion Album Class

Happy 2011 to everyone !
Our 2010 was so fantastic we hardly wanted it to be over.
Lapping it up in the USA, we are now back and ready for the stresses and humidity of Singapore life :)

AND I'm teaching at Scraplicious, a brand new scrap shop at the basement of Parkway Parade ... Finally, a scrap shop for us easties !

Here's a sneak peak of the Accordion Album class I'm teaching on Sun, 23rd Jan ...


Yummy RIGHT ??? ANd i tell ya, this class is really such value for money as your pack is going to be brimming with premium goodies from Websters Pages and Prima. What better way to capture your memories of 2010 before they fade away ?? :) Sign up HERE !

Tuesday, August 31, 2010

Sneak peek into the Man's den..


Ooooo.... my MAN's quite sentimental.
Of course I had to share the table with mints and chewing gums, but oh well, it could be worse!
At least the projects to commemerate our 14th Anniversary, plus the girls' Fathers' Day gifts, all laid proudly on the table :)


I made this flip around frame to show the BeFORE and After ... 
This is where we are NOW.... 
(a contemporary classic feel to accompany it)
AND this was us YONKS ago !!! gosh... how i've aged !!!
(thus a dye-stained, distressed look !!)
Used Tim Holtz's alpha masks here to set the background look,  then inked all around them...
Loads of rub-ons to complete the effect...
Sorry didn't manage to quite get the bronze medallion which has 'Cherish' etched on it...
haha... i'm on a roll posting... gotta keep it up from my 2x a month posts... yea, i'm working on it...

Monday, August 30, 2010

Welcome home Papi !!

Papa was away for a week and we had to keep ourselves really busy ! Gosh, it is so tough being a SINGLE mum !!! Yet, the kids enjoyed the novelty of keeping the house as 'untidy' as they liked cos' Papa's not home. But he was sorely missed certainly... as seen from these handmade cards they made with my stamps and which they coloured using their own LePlume markers....

Here's my contribution... and a short tutorial if you gals wanna scraplift this...
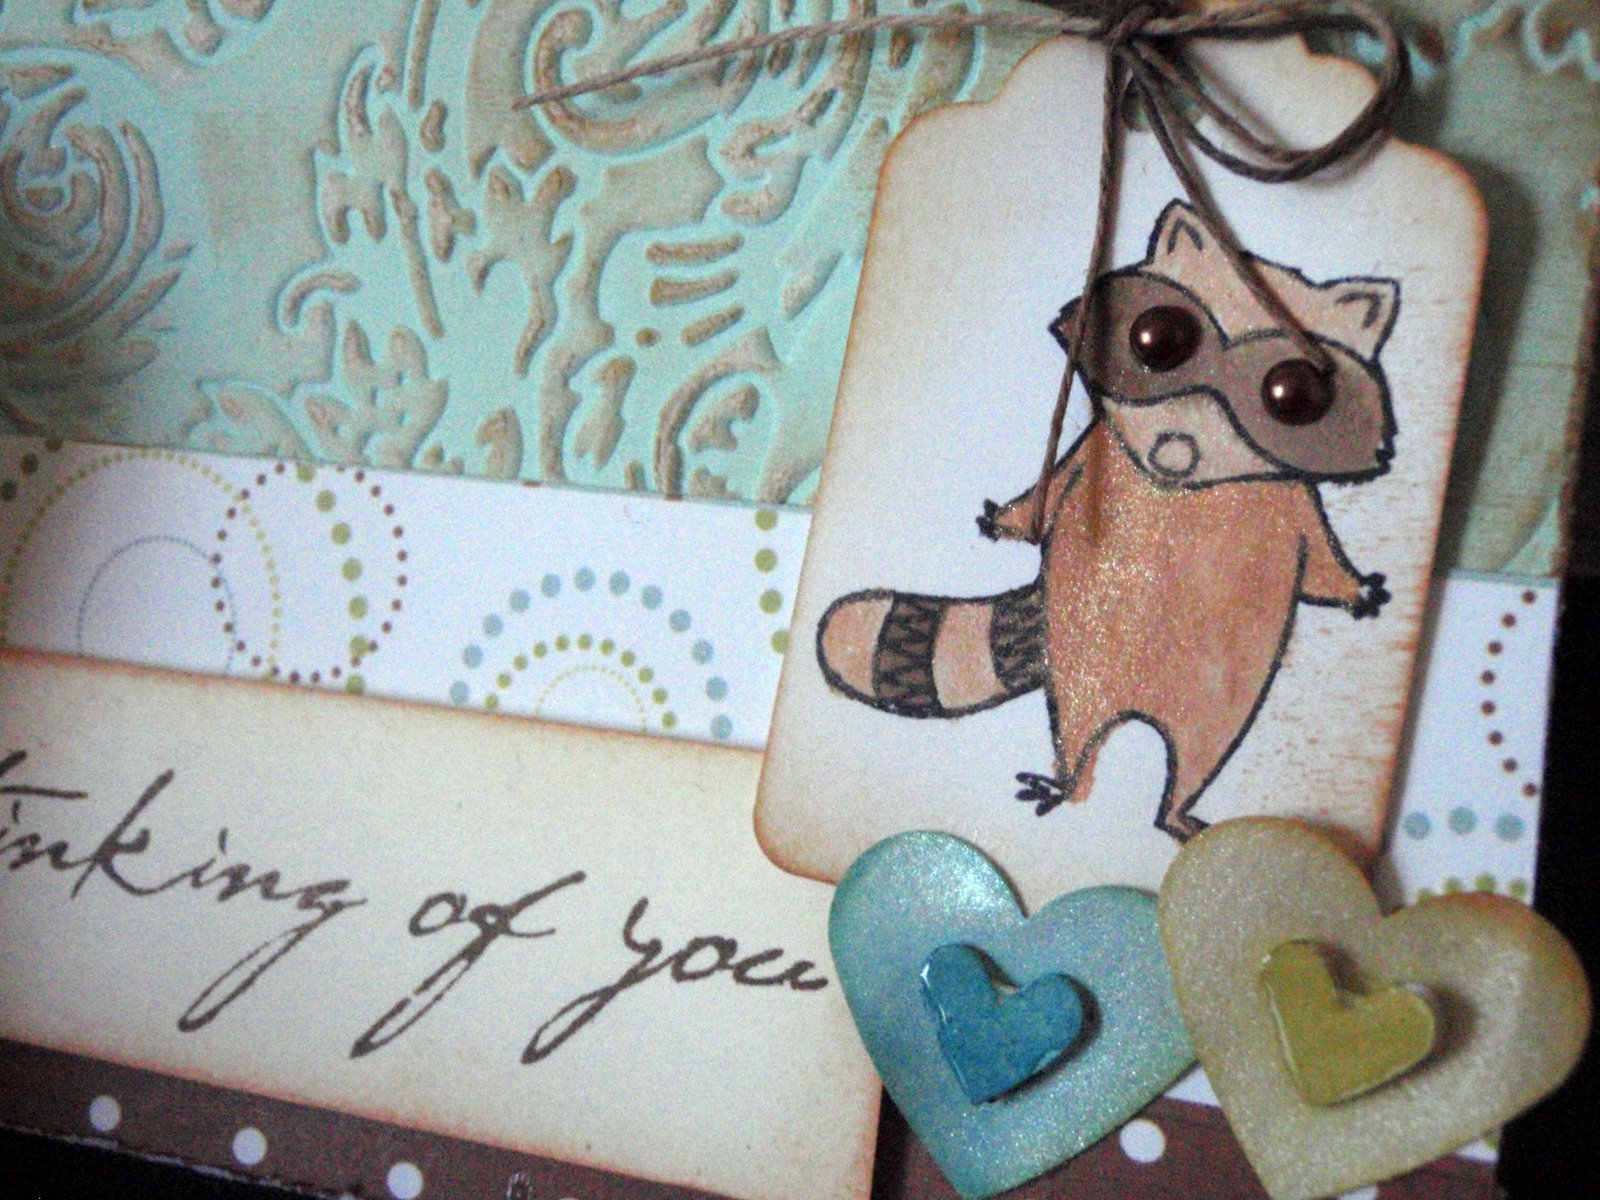
Love this cutey racoon that i coloured in using a brush dipped in my tea dye, antique linen and walnut stain distress inks, mixed up with some Ranger's glimmer pearls for shine, stamped on a white tag. Inked the sides, tied some twine (doubled), added cocoa pearls and he's complete !

 
As you can tell, I have not gotten over using my embossed texture dies :)
So here's a sky blue notecard that i ran through the Big Shot using one of Tim Holtz's texture dies, sanded the embossed portion like crazy, and added distressed ink over the top for visibility and a worn feel. Added strips of Scenic Route paper from long long ago and a sentiment and DONE !
Oh yes, those lovely hearts !! Used my new EK success double heart punch (not sure why i didn't discover it earlier), stomped distress inks all over them in Tumbled Glass and Marigold, then spritzed them with pearlized water for shine. (Nb to Self: must check out if Michaels has more of these double punches !). You can notice some of the shine in the picture, but in real life - it is really lovely.

Lastly, i attached foam dots behind the small hearts so they 'POP' and a layer of Glossy Accents for an almost 'acrylic' feel to the center hearts. Love this - you will certainly see more of these hearts in upcoming projects !!
AND a 'POP UP' sentiment inside....
thanks for dropping by !

Friday, August 13, 2010

Cards

Haven't really been much of a card maker, but this is certainly an addiction coming along ! It's quick, fun to do, and wonderful for trying new techniques and stamps

The first one here has a more vintage-gy old feel, and love how the Perfect Pearls accentuate the stamped image. Stamped first with distress ink then pulsed it with the shimmer of the pearls. Misted at the end to seal the pearls so it bonds with the paper...


Love this 'silly' over the top peacock from Hero Arts. Coloured with Copics and adhered to background that i had run through my Big Shot using one of Tim Holtz's embossed folders.
 
Of course, couldn't spare the bling at the end with Ranger's stickles...

Monday, August 2, 2010

Crafty goodies...

Hey ALL !
Sorry for the silence as we've been on a ROAD trip all around CA !! It's amazing - the Big Sur coast, Monterey Bay, cutting across the High Sierras via Tioga Pass to Mammoth Lakes, and down past the Mojave Desert. Spellbinding stuff....

But here's some crafty goodness I managed to squeeze time for !!

Played with lots of inks and white paint here. Stamped image all over the frame with white paint and then wiped off excess with some pearlized spritz using Ranger's mini mister and distress inks !

Love the softness that resulted and the meld of colours, and the sparkle under the light ! Totally pretty.  Used copic colours for the flowers and of course can't resist those butterflies and ladybug for some textured effect.


Another quick layout that allowed me to experiment with different ways of using Perfect Pearls, Tim Holtz's masks and distress inks.

Celebrating 14 years.... time flies...

Sunday, July 11, 2010

Welcome frame for doorway...

Totally altered this plain pine wood frame with inks and had soo much fun !!
Used a ton of Ranger products here too :)


And it's perfectly easy to do ! Here are some tips :

Frame:
  • Ink up sides of frame with distress inks like crazy :)  I did this in a variety of colours - fired brick, dried marigold, broken china, tea dye - all using Ranger's distress inks 
  • Spritz with pealised water mist ( i used Ranger's mini mister, filled with water, and added some white perfect pearls powder for the 'blingy' spritz.. ). Allow to dry.
  • Stamp your favourite images around the frame. I used a Hampton Art rubber stamp, and some random ones from 'Recollections' and Ranger's distressed ink in "Black Soot". I also masked on a Tim Holtz compass in 'Broken China'

Interior:
  • Using a blue cardstock, I stamped the background with my polka dot stamp using Ranger's perfect medium and then brushed on some metallic gold perfect pearls powder. Should have spritzed on some water to 'seal' the powder but forgot - oh well, have to live and learn :) !!
  • Took a maya road tag chipboard and inked it in walnut stain, then spritzed it with some pearlised water using the walnut stain reinker, mixed with gold perfect pearls, for a 'metalized' look
  • Attached prima flowers - gave it a brush of tea dye distressed ink first; added the bird charm; a chipboard heart; a tag on which I hand-wrote the word 'welcome' for a more personalised touch.
  • Hung on wall. HAPPY :)


thanks for dropping by !!